
NOTE: BE SURE TO SAVE YOUR WORK EARLY AND OFTEN IN YOUR STUDENT FOLDER. WORK SAVED ON THE LIBRARY MACs IS DELETED FREQUENTLY. IF YOU SAVE YOUR WORK TO THE LOCAL COMPUTER IT WON'T SURVIVE AND YOU'LL BE MIGHTY UPSET
► HELP FROM ASTRO PROFESSIONALS
from a professional is HERE (I actually got most of our images from him!)
Or try THIS tutorial from the Chandra X-Ray Observatory at Harvard University (you'll need to download the FITS translator software to see their files. If you don't want to do that, the tutorial works JUST fine for our class files.
► OPENING AND SAVING FILES ON THE MACs
NOTE: BE SURE TO SAVE YOUR WORK EARLY AND OFTEN IN YOUR STUDENT FOLDER. WORK SAVED ON THE LIBRARY MACs IS DELETED FREQUENTLY. IF YOU SAVE YOUR WORK TO THE LOCAL COMPUTER IT WON'T SURVIVE AND YOU'LL BE MIGHTY UPSET
To OPEN a file that you've saved on your MAC
- Click File - Open
To SAVE a photo from this page on your MAC:
- Do a right mouse click on the object and select Save Image As
- Open the pictures folder
- Save the picture there with an appropriate name
- Copy ALL files associated with that object and save them too
NOTE: BE SURE TO SAVE YOUR WORK EARLY AND OFTEN IN YOUR STUDENT FOLDER. WORK SAVED ON THE LIBRARY MACs IS DELETED FREQUENTLY. IF YOU SAVE YOUR WORK TO THE LOCAL COMPUTER IT WON'T SURVIVE AND YOU'LL BE MIGHTY UPSET
► STEP-BY-STEP: PROCESSING FILES:
- Open Photoshop
- Make sure it is set to "essentials" in the upper right hand corner drop-down
- Find and open your first file
- Notice on the right hand panel there is a tab labeld "Background." That area will list all your files and changes to your files. However, we DO NOT want our first image to come in as the background. So... do a right mouse on that and select "Duplicate Layer" and change the name of that new duplicate layer to "LAYER 01"
- Now go back to the background layer, do another right mouse and delete the background layer.
- Be sure and change the layer from Normal to Screen
- From the "Image" menu option change the Mode to RGB
- To colorize the image select the following:
- From the "Image" menu select "Adjustments"
- From "Adjustments" menu select Hue/Saturation
- From inside the Hue/Saturation
Options
- make sure the "colorize" box is checked
- change the color to your desired color as follows:
- 0 is red, 60 is yellow, 120 is green, 108 is cyan, 240 is blue, 300 is magenta and other blends are as you select
- 0 is red, 60 is yellow, 120 is green, 108 is cyan, 240 is blue, 300 is magenta and other blends are as you select
- change saturation to 100
- change lightness to -50
- To colorize the image select the following:
- Make sure you can colorize the image. If the colorizing options are grayed out, you may need to "Rasterize" the picture. Go to the "Layers" menu option and select "rasterize" (you may need to make your layer a "smart object" first.
- Select FILE and SAVE to make sure you preserve the new file
► LAYERS
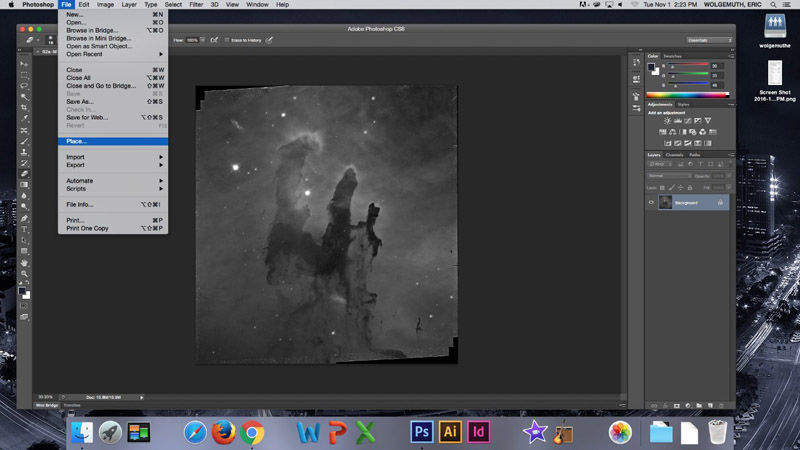
This is KEY. Click on FILE and choose PLACE:
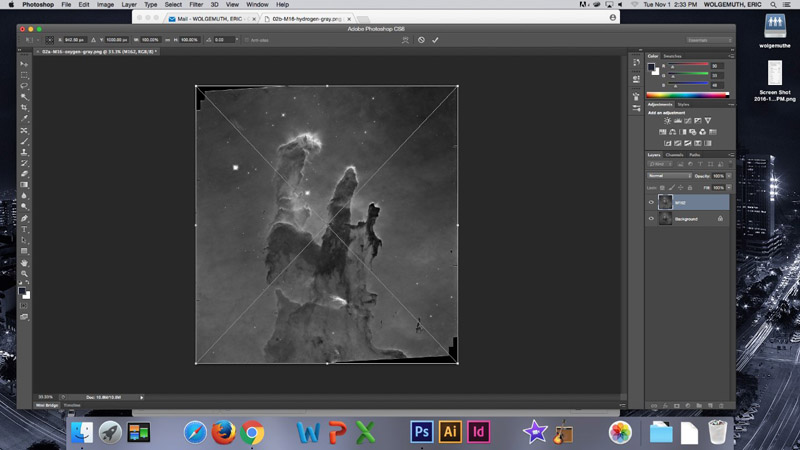
Open the second file and place it right on top of the first and click the mouse to "place" that image once it is centered.
Notice there is a new layer there on Photoshop on the right side panel..be sure and label that appropriately
Now repeat that process with each picture
Make SURE the color pallet toolbox is available:

NOTE: BE SURE TO SAVE YOUR WORK EARLY AND OFTEN IN YOUR STUDENT FOLDER. WORK SAVED ON THE LIBRARY MACs IS DELETED FREQUENTLY. IF YOU SAVE YOUR WORK TO THE LOCAL COMPUTER IT WON'T SURVIVE AND YOU'LL BE MIGHTY UPSET